
Your First Hour on a Stand-Up Paddleboard, Step by Step
Learn to choose suitable gear and calm water, control the board from your knees, stand gradually, stop, turn, fall safely and remount.
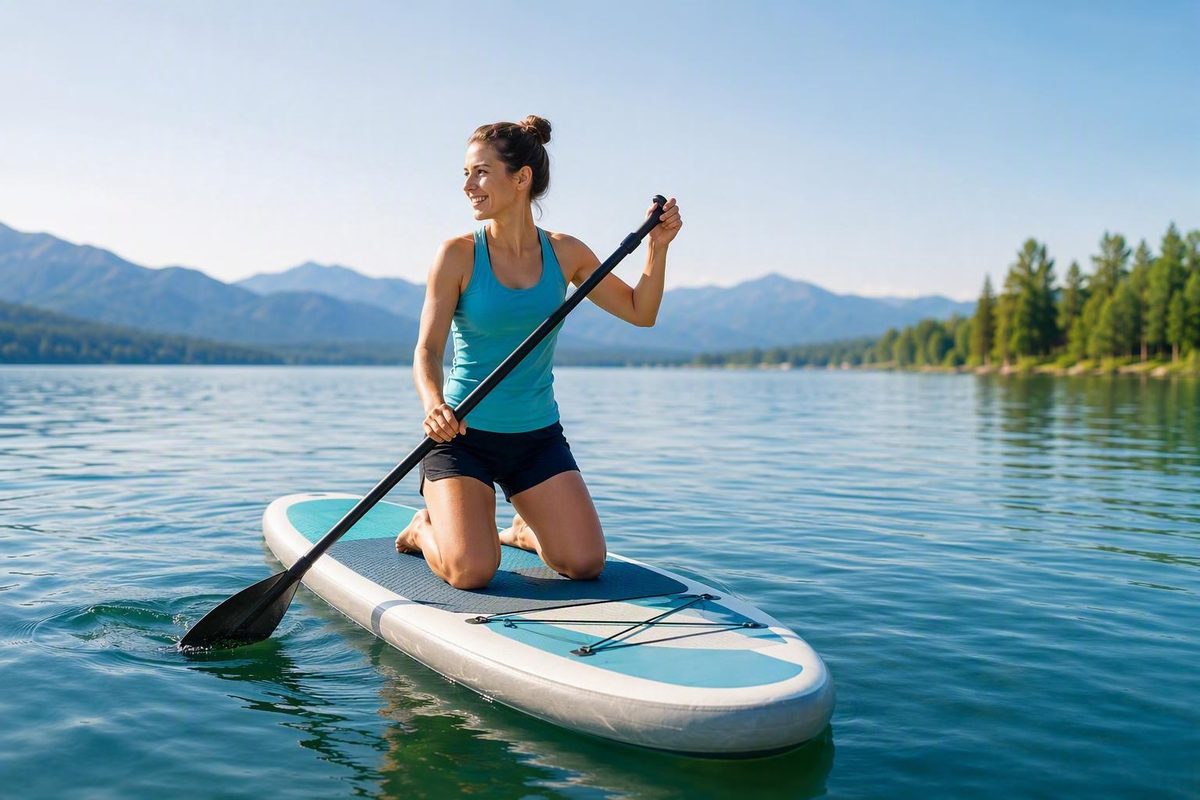
Stand-up paddleboarding, usually shortened to SUP, means propelling a buoyant board with a single-bladed paddle while kneeling or standing. For a first session, the goal is not to stand as quickly as possible. It is to choose suitable equipment, recognize manageable conditions, control the board from your knees, and learn how to stop, turn, fall safely, and get back aboard.
This guide covers recreational paddle boarding for beginners on sheltered flat water. It does not prepare you for surf, whitewater, strong currents, offshore travel, exposed cold water, tidal routes, or technically demanding rivers. Those environments require additional equipment, local knowledge, and qualified instruction.
This is general introductory information, not a substitute for hands-on training or venue-specific safety advice. If you are uncertain about flotation, clothing, leash selection, weather, water temperature, swimming ability, or recovery, arrange a supervised session with a qualified paddlesport or water-safety professional.
Start with a rental, lesson, or supervised taster session
Renting, borrowing, or joining an introductory session is usually more useful than buying a board before you have paddled one. You can discover how different widths, shapes, materials, and deck layouts feel without committing to equipment based only on specifications or marketing.
A reputable rental operator should ask about your size, experience, planned activity, and any passengers or cargo. This helps the operator select a stable board with enough capacity for the complete load. If possible, compare more than one design during your first few sessions. A board that feels manageable to one beginner may feel excessively wide, narrow, heavy, or difficult to paddle to another.
A lesson adds more than equipment selection. An introductory session can cover launching, water safety, standing, basic strokes, falling, and self-rescue. The Canal & River Trust’s beginner guide says its taster sessions typically last one to two hours and usually include water safety, standing, basic paddling, and self-rescue.
For your first outing, go with a qualified instructor or a capable companion who understands the venue. Stay in a visible area with easy shore access rather than choosing a quiet but remote location. Your companion should be able to help reassess conditions, call for assistance, and support a recovery if you cannot remount.
Set a modest definition of success. You may spend ten minutes, half the session, or the entire outing on your knees. Kneeling lowers your center of gravity and lets you learn steering, braking, and paddle handling with fewer balance demands. Some beginners stand during an introductory session; others need more time. Neither outcome should be promised.
Consider the four starting options this way:
- Rent if you want staff to match equipment to your size, load, and venue.
- Borrow only if the board has adequate capacity, is in sound condition, and comes with suitable safety equipment.
- Take a lesson or taster session if you want structured instruction in safety, strokes, falling, and recovery.
- Buy after you understand where you will paddle, how you will transport and store the board, and which designs feel practical.
Keep the setting within the scope of beginner instruction: sheltered water, easy shore access, minimal traffic, and no meaningful current. A calm-looking river, open coastline, or offshore route can contain hazards that cannot be assessed from a general article.
Choose a stable board for your total load and intended use
A stable all-around board is the usual starting category for recreational paddleboarding. Broad planing hulls are commonly presented as beginner-friendly because they emphasize stability and maneuverability, while medium-length boards are often used for general recreation. These labels are starting points, not guarantees.
Choose the complete board rather than one attractive measurement. Consider:
- Your skill and confidence
- Your intended activity
- Normal water and weather conditions
- Your body size
- The weight of everything carried
- Storage space
- Transportation method
- Your ability to lift and launch the board
- The manufacturer’s stated capacity
Total payload means more than the paddler’s body weight. Include water, food, clothing, safety gear, dry bags, fishing equipment, children, dogs, and every other passenger or item carried. Exceeding the stated capacity can make a board sit lower and become harder to paddle, according to the REI paddleboard buying guide.
Width, volume, length, and shape interact:
- More width generally adds stability, but it may reduce speed or make it harder for a smaller paddler to keep the paddle vertical and close to the rail.
- More volume supports more weight, but volume alone does not show how stable or efficient the board will feel.
- More length can improve glide and straight-line tracking, although a long board may be harder to turn, carry, and store.
- Hull and outline affect behavior. A broad planing shape emphasizes stability and maneuverability; a narrow displacement-style nose is generally designed for efficient tracking.
- Capacity remains essential. A large-looking board is not necessarily suitable if its stated load limit is inadequate.
Published beginner dimensions vary. One beginner guide suggests approximately 10–12 feet in length and 30–32 inches in width, while another commercial guide extends beginner-oriented widths to approximately 32–35 inches. Treat these figures only as orientation—not as a universal prescription. A 30-inch board might be manageable for one person and frustratingly unstable for another; an exceptionally wide board may feel steady but cumbersome to someone with a short reach. The approximate 10–12-foot and 30–32-inch range appears in this beginner board overview.
Do not infer capacity from length or width alone. Two boards with similar dimensions can have different thicknesses, outlines, rocker profiles, rigidity, and load limits. A board also needs enough usable deck space for planned cargo without forcing you away from its balanced standing area.
When renting, describe your full load honestly and ask for a forgiving all-around design. When buying, follow the manufacturer’s capacity information and discuss your normal conditions with a reputable rental operator, instructor, or specialist retailer. If you are near the stated limit, seek product-specific advice rather than assuming that the board will perform comfortably simply because the load is technically below that number.
Inflatable or hard board: decide by logistics and conditions
Neither construction is universally better for a beginner. Start with the constraints that will affect every outing: where you will keep the board, how you will transport it, whether you can lift it, how much setup you will tolerate, and where you expect to paddle.
Choose an inflatable when compact storage matters
An inflatable board can be deflated and packed for storage or transportation. That can be decisive if you live in an apartment, use public transport, have limited vehicle space, or want to travel with the board.
The tradeoff is setup. Before paddling, you must unpack the board, inflate it according to the manufacturer’s instructions, install any removable fin, and inspect the valve and board. Almost half of surveyed users keep their inflatable boards inflated even when not in use Inflatable SUP vs. Hard board, comparison of pros and cons of iSUP’s and epoxy stand up paddleboards - Blue Planet Surf. Some owners leave inflatable boards assembled when storage and transport permit, but doing so reduces the compact-storage advantage.
Inflatable SUPs commonly use a PVC exterior and internal drop-stitch threads connecting the upper and lower surfaces. Those threads help the board retain its shape under pressure. Construction quality cannot be established from one pressure figure, price, material name, or marketing feature.
Choose a hard board when ready-to-use rigidity matters
A solid or hard board does not require inflation, so it can go from storage to water with less setup. The tradeoff is that it needs full-length storage and is commonly transported on a suitable vehicle rack or inside a vehicle that can safely accommodate it.
Hard boards generally provide a more rigid feel. Their shaping can also be refined for particular performance goals, which may matter in chop, surf, or other demanding conditions. Results still vary by design, quality, load, and rider; “hard” does not automatically mean stable, fast, safe, or suitable for a beginner. Commercial comparisons commonly identify portability as an inflatable board’s central advantage and rigidity and refined shaping as potential hard-board advantages, as summarized in this inflatable and hard-board comparison.
Use this decision framework:
| Your priority | Construction to consider |
|---|---|
| Compact storage | Inflatable |
| Travel or transport without a roof rack | Inflatable |
| Minimal launch setup | Hard board |
| A more rigid feel | Hard board |
| Specialized performance | Often hard, depending on the discipline |
| Uncertain preference | Rent both before buying |
Treat broader claims about stability, durability, speed, safety, and lifespan cautiously. The best beginner choice is a board you can store, transport, prepare correctly, and use in your intended conditions with adequate capacity.
Pack the essential gear and inspect it before launching
Use this checklist before leaving home and again at the launch:
- [ ] Suitable board with adequate capacity
- [ ] Correctly attached fin
- [ ] Adjustable SUP paddle
- [ ] Properly fitted personal flotation device or buoyancy aid
- [ ] Signaling device, such as a whistle
- [ ] Drinking water
- [ ] Sun protection
- [ ] Clothing selected for the weather, water, and possible immersion
- [ ] Dry clothes and a towel left in a protected place
- [ ] Protected communication method, such as a phone in a waterproof case
- [ ] Any venue-specific permit, licence, or proof of access
- [ ] Environment-appropriate leash system, if advised for that venue
- [ ] Light if you may be out near or after sunset, subject to current local rules
A flotation device must fit correctly and be suitable for the user and activity. Do not assume that simply strapping one to the deck satisfies the applicable law or provides the protection you expect. Rules covering carriage, wear, approved types, age, and location vary. REI’s introductory guide discusses basic equipment and U.S.-focused requirements while directing readers to verify applicable rules; it should not replace the government or waterway authority responsible for your venue. See the REI beginner equipment overview.
Clothing should reflect both the weather and the water. Quick-drying clothing may be practical for a warm, sheltered outing. In colder, wetter, or more exposed conditions, thermal layers, waterproof clothing, a wetsuit, or a drysuit may be appropriate. If you do not know what immersion protection is appropriate, do not rely on guesswork—ask a qualified local instructor before launching.
Before entering the water:
- Inspect the board for damage, loose fittings, or anything that could affect use.
- Confirm that the fin is present and securely attached.
- Prepare an inflatable board exactly as its manufacturer directs; check its valve and overall firmness.
- Adjust the paddle to an initial working length.
- Put on your flotation device and check its fit.
- Secure water and small items so they cannot roll around or interfere with your stance.
- Protect your communication device while keeping it accessible.
- Confirm the launch, return point, and alternative exits.
Leashes require environment-specific judgment. This guide therefore does not prescribe an ankle, calf, waist, coiled, straight, or quick-release arrangement. Ask a qualified local instructor or paddling authority which system—if any—is suitable for the exact venue.
Separate sensible preparation from legal compliance. Flotation, signaling, lighting, leash, age, access, and licensing requirements differ among countries, states, provinces, municipalities, managed waterways, and private venues. Check the current information published by the relevant government agency, harbor authority, park, waterway manager, or launch operator.
Choose forgiving conditions and make a conservative route plan
The right first location has calm, sheltered water, little wind, minimal boat traffic, an uncomplicated launch, and easy access to shore. Choose a place with several nearby exits rather than one distant take-out that commits you to completing the route.
Check the forecast before leaving home, but do not treat it as permission to launch. Reassess the water when you arrive. Conditions may differ from the forecast, and a sheltered parking area can conceal stronger wind on open water.
Review:
- Wind direction and expected changes
- Gusts, not just average wind
- Current or tidal movement
- Waves and boat wake
- Water temperature
- Visibility
- Boat and personal-watercraft traffic
- Launch and landing access
- Nearby obstacles
- Alternative exits
- The complete return route
There is no universal safe wind-speed threshold for every beginner. Direction, gusts, fetch—the distance wind travels across open water—current, equipment, route, shoreline, and paddler ability all affect the consequences. A light offshore wind can move you away from land, while a headwind on the return can make a short trip exhausting.
When the wind is light and stable, beginning into it may make the planned return easier. This is a planning tactic, not a guarantee: wind can strengthen or change direction. Stay close enough to shore that you can take an early exit rather than depending on the forecast remaining correct.
For a first recreational outing, plan approximately one hour, including instruction, drills, and recovery practice—not an hour of continuous travel. Remain close to shore with an instructor or capable companion. The one-hour starting point, calm water, little wind, an easy launch, and paddling with a companion are included in REI’s beginner outing guidance.
Postpone the outing, turn back, or take the nearest suitable exit when:
- The wind is rising
- Gusts are pushing you off course
- Waves or boat wake are increasing
- Visibility is deteriorating
- You cannot maintain your intended direction
- Your hands, legs, or judgment are becoming fatigued
- You feel cold, unwell, or anxious
- Conditions exceed your equipment or ability
- Your return route is becoming harder
If the wind strengthens while you are out, kneel to lower your center of gravity and reduce your exposure to it. Take the safest early exit instead of forcing yourself to complete the original route; beginner guidance from Thule likewise recommends kneeling if the wind becomes too strong.
Do not assume that a river is suitable merely because it looks slow. Locks, weirs, low structures, moorings, submerged obstacles, restricted access, and limited exits require local assessment. Tides, offshore winds, lightning exposure, strainers, and low-head dams are also outside this guide’s practical scope. If any may affect the venue, obtain qualified local advice instead of applying flat-water instructions.
Managed waterways can have route-specific rules. For example, Canal & River Trust licensing, lock, and route restrictions apply to its own network and should not be generalized to other waterways. Check the relevant waterway manager’s current rules before traveling.
Launch on your knees, then stand in a controlled sequence
For a simple beach launch, carry or float the board until you are in approximately knee-deep water before mounting. This gives the fin more clearance from sand, rocks, and the bottom. The knee-deep starting point is described in this beginner launching guide. Check that you are not entering unexpectedly deep water or current, and control the board so it cannot strike another person.
Position yourself beside the board’s center. The carry handle is often a useful visual reference for the balance point, although deck layouts vary. Place the paddle across the board where you can control it, climb aboard from the side, and settle on your knees around the center.
Do not stand immediately. First, spend several minutes learning how the board responds:
- Shift your weight gently from side to side.
- Paddle forward on both sides.
- Stop with the blade.
- Try a reverse stroke.
- Make a broad turn.
- Look ahead while the board moves.
- Practice returning your hands to a stable position.
When you are ready to stand:
- Begin from a stable kneeling position near the center.
- Keep the paddle controlled and place your hands on the board for support.
- Lift one foot and place it approximately where that knee had been.
- Repeat with the other foot.
- Pause in a low crouch with your hands still supporting you.
- Look toward the horizon or your intended direction.
- Rise gradually by extending your legs rather than snapping your torso upright.
Once standing, keep your feet parallel and approximately hip- to shoulder-width apart, centered around the balance point. Soften your knees, keep your torso upright, and direct your eyes ahead. A rigid stance makes it harder to absorb small movements, while looking down can pull your posture out of alignment.
Avoid these common problems:
- Locked knees: You cannot absorb the board’s movement effectively.
- Rigid bending at the waist: Your weight becomes harder to control.
- Looking at your feet: Your posture tends to collapse and small wobbles feel larger.
- Standing too far forward: The nose may sit too low and become harder to control.
- Standing too far back: The tail may sink, adding drag.
- Using a surfing stance too early: A staggered stance can make basic flat-water paddling less predictable for a beginner.
If you become unstable, do not fight to remain standing at all costs. Lower into a crouch or return to your knees. Kneel when the wind rises, when you need to regain control, or whenever standing distracts you from steering and route awareness.
If standing is uncomfortable or unsuitable for you, continue practicing from your knees. Anyone uncertain about balance, mobility, mounting, swimming ability, or remounting should arrange supervised instruction and an assisted recovery plan. This guide does not establish an adaptive technique for any individual need.
Learn four controls: go straight, slow down, reverse, and turn
Before traveling away from the launch, learn to make the board go where you intend. Distance is not useful if you cannot stop or turn.
Set the paddle length and orientation
Paddle-sizing formulas are approximate starting points. One method is to stand the paddle upright, raise an arm overhead, and adjust the handle to around wrist height. Body proportions, paddle design, board thickness, stance, and paddling discipline may require a different setting, so adjust again if your shoulders feel cramped or you cannot immerse the blade comfortably. The wrist-height method appears in REI’s beginner paddle guidance.
The blade’s angle faces forward, away from you, rather than curling backward as though it were a scoop. This often feels counterintuitive at first.
Place one hand on the T-grip and the other on the shaft. When paddling on the right, the left hand is generally on the grip and the right hand on the shaft; reverse both hands when changing sides. Do not retain the same grip and merely swing the paddle across your body.
Go straight with the forward stroke
Think of the forward stroke as five connected phases:
- Reach: Rotate your torso and place the blade ahead without overextending.
- Catch: Immerse the full blade.
- Power: Press with the top hand and rotate through the torso while keeping the lower arm controlled.
- Exit: Remove the blade near your feet or ankles rather than dragging it far behind.
- Recovery: Bring the blade forward under control.
Keep the blade close to the rail. A more vertical shaft and a stroke running close alongside the board generally help it track straighter. If the paddle sweeps far away from the rail, the stroke creates more turning force.
Use controlled torso rotation rather than pulling only with your arms. Your arms connect you to the paddle, but rotation distributes the effort and helps produce a repeatable stroke.
Slow down and stop
For simple braking, place the blade in the water behind you near the tail and hold it with control. Expect the board to react; an abrupt or poorly braced stop may disturb your balance.
You can also use a reverse stroke. Reach the blade behind you, immerse it, and move it toward the front. This slows the board and can contribute to a tighter turn. Practice gently from your knees before applying more force while standing.
Reverse
Continue controlled reverse strokes on alternating sides to move backward slowly. Look where the board is going. Reversing is useful for creating space from a shoreline, correcting an approach, or stopping before an obstacle, but it does not replace early route planning.
Turn with a sweep stroke
Reach forward and move the paddle through a broad arc away from the board. A forward sweep generally turns the nose away from the side on which you paddle: a sweep on the right turns the nose left, and a sweep on the left turns it right.
Practice in open space before turning near docks, swimmers, boats, or rocky shorelines.
| Problem | Likely correction |
|---|---|
| The board spins or zigzags | Keep the blade closer to the rail, make the shaft more vertical, and switch sides deliberately |
| Each stroke produces little movement | Immerse the full blade before applying power |
| Your arms tire rapidly | Reduce frantic strokes and use controlled torso rotation |
| You feel increasingly unstable | Soften your knees, look ahead, and return to kneeling |
| The board keeps turning after each stroke | Finish the stroke near your feet instead of pulling far behind |
| You cannot stop predictably | Practice gentle braking and reverse strokes from your knees |
A beginner does not need an extensive stroke vocabulary during the first hour. You need reliable forward movement, a way to reduce speed, controlled reverse movement, and a turn in both directions. Practice each action without rushing.
Practice falling and remounting before you travel farther
Self-recovery is a foundational skill, but deliberate immersion is not appropriate in every setting. Do not intentionally fall into cold or otherwise unsuitable water based on this guide. Practice only when a qualified instructor or capable companion has assessed the venue, water temperature, clothing or immersion protection, your swimming ability, and the recovery plan. Stay close to an immediate exit while you are warm and energetic.
If those conditions cannot be established—or if you are uncertain that you can remount—learn through a qualified supervised session instead. Calm water and proximity to shore do not by themselves make deliberate immersion appropriate.
When a fall is unavoidable, aim to fall away from the board rather than onto it. Do not try to save the attempt by jumping toward the deck. Immediate personal safety takes priority over retaining the paddle or avoiding cosmetic equipment damage. Before any supervised practice fall, check for shallow water, rocks, submerged objects, traffic, and other people.
After entering the water:
- Orient yourself and check whether you are injured.
- Approach the board from the side near its center.
- Grasp the center handle or a secure part of the rail.
- Float your legs behind you rather than hanging vertically.
- Kick while pulling or sliding your chest across the deck.
- Continue until your upper body is supported.
- Bring one leg and then the other onto the board.
- Settle into a prone, seated, or kneeling position before attempting to stand.
This basic side-remount sequence—center approach, legs floating behind, kicking, and pulling the chest onto the board—is described in beginner instruction from Hero SUP. It assumes sufficient mobility, reach, and upper-body control and will not work equally well for everyone.
If you are not confident that you can remount, establish an assisted recovery plan before paddling away from an immediate exit. Do not treat a board, leash, or flotation device as a guarantee that recovery will be straightforward. This guide does not provide cold-water rescue, moving-water rescue, emergency treatment, or adaptive remount instruction.
Once aboard, pause. Recover your breathing, account for your paddle and essential equipment, and reassess the outing. Return to shore if you are cold, injured, exhausted, frightened, or repeatedly unable to remount. If worsening conditions caused the fall, remain low and take the safest available exit rather than standing merely to prove that you can.
A sensible first hour follows this progression:
- Check equipment, flotation, local rules, and conditions.
- Launch and establish balance on your knees.
- Practice forward, reverse, braking, and sweep strokes while kneeling.
- Stand gradually if you feel ready.
- Repeat forward control, stopping, and turning while standing.
- Practice a fall only if qualified supervision and suitable immersion conditions are in place.
- Remount from the side near the board’s center.
- Settle, reassess, and return before fatigue develops.
Save this compact checklist for your first outing:
- Use appropriately sized rental or borrowed equipment.
- Wear properly fitted, suitable flotation.
- Verify current local rules and access requirements.
- Choose calm, sheltered, low-traffic water.
- Paddle with a capable companion or instructor.
- Stay close to shore and nearby exits.
- Begin on your knees.
- Practice stopping and turning before traveling.
- Rehearse a remount only under suitable, supervised conditions.
- Return before fatigue or conditions worsen.
Standing is only one milestone. Control, judgment, and self-recovery are the foundations for progressing beyond a first session. Do not move from sheltered flat water into surf, whitewater, strong current, offshore routes, tidal passages, or cold and exposed water on the strength of this introductory guide alone. Seek environment-specific instruction from a qualified paddlesport or water-safety professional.
Is paddleboarding hard for a complete beginner?
It can be challenging because balance, paddle handling, steering, and route awareness are all new at once. The difficulty also depends on the board, conditions, instruction, and individual paddler.
Make the first session more manageable by using a stable board, choosing calm sheltered water, starting on your knees, and learning to stop and turn before trying to stand. Do not measure success by how quickly you rise. A first outing spent largely on the knees can still teach essential control skills.
What size paddleboard is best for a beginner?
There is no single best beginner size. A stable all-around board with enough volume and stated weight capacity for the complete load is the usual starting point. Total load includes the paddler, water, clothing, equipment, children, pets, and other cargo.
Published commercial guidance spans approximately 10–12 feet in length and roughly 30–35 inches in width, but that range is only an orientation. Width, length, volume, hull shape, rigidity, capacity, rider size, and conditions must be considered together. Ask a reputable rental operator to fit your first board and follow the manufacturer’s capacity information.
Should a beginner buy an inflatable or hard paddleboard?
Buy according to logistics and intended use, not a claim that one construction is always more beginner-friendly.
Choose an inflatable if compact storage, travel, and easy transportation are priorities—and if you accept inflation, drying, and packing before and after use. Consider a hard board if you have suitable storage and transport, want less launch setup, and prioritize a rigid feel or specialized performance.
If possible, rent both. A trial can reveal whether setup inconvenience, carrying difficulty, deck feel, or storage space matters more than it appeared to on paper.
Do I need a life jacket, leash, whistle, or licence to paddleboard?
Use safety equipment appropriate to the venue and comply with the current laws that apply there. Flotation-device, signaling, lighting, leash, licensing, age, and access rules vary by jurisdiction and managed waterway. A rule stated for one country, state, canal system, harbor, or park should not be assumed to apply elsewhere.
Use properly fitted flotation and carry an appropriate signaling device as conservative preparation. Seek qualified local advice about leash selection because current, surf, locks, and snag hazards can change which system is appropriate. Check current information from the relevant government agency, waterway manager, harbor authority, park, or launch operator before setting out.
How do I get back onto a paddleboard after falling?
Approach from the side near the board’s center. Hold the center handle or a secure section of rail, float your legs behind you, kick, and pull or slide your chest onto the deck. Bring your legs aboard and settle before trying to kneel or stand.
Practice only in water suitable for deliberate immersion, close to an immediate exit, with qualified supervision or a capable companion and a workable recovery plan. If you are cold, hurt, exhausted, or unable to remount reliably, prioritize assistance and the safest available exit rather than continuing the outing.