
How to Set Up a Pickleball Practice Wall
Choose a usable pickleball practice wall, mark net-height and Kitchen references, check the rebound, and understand what wall targets can—and cannot—tell you.
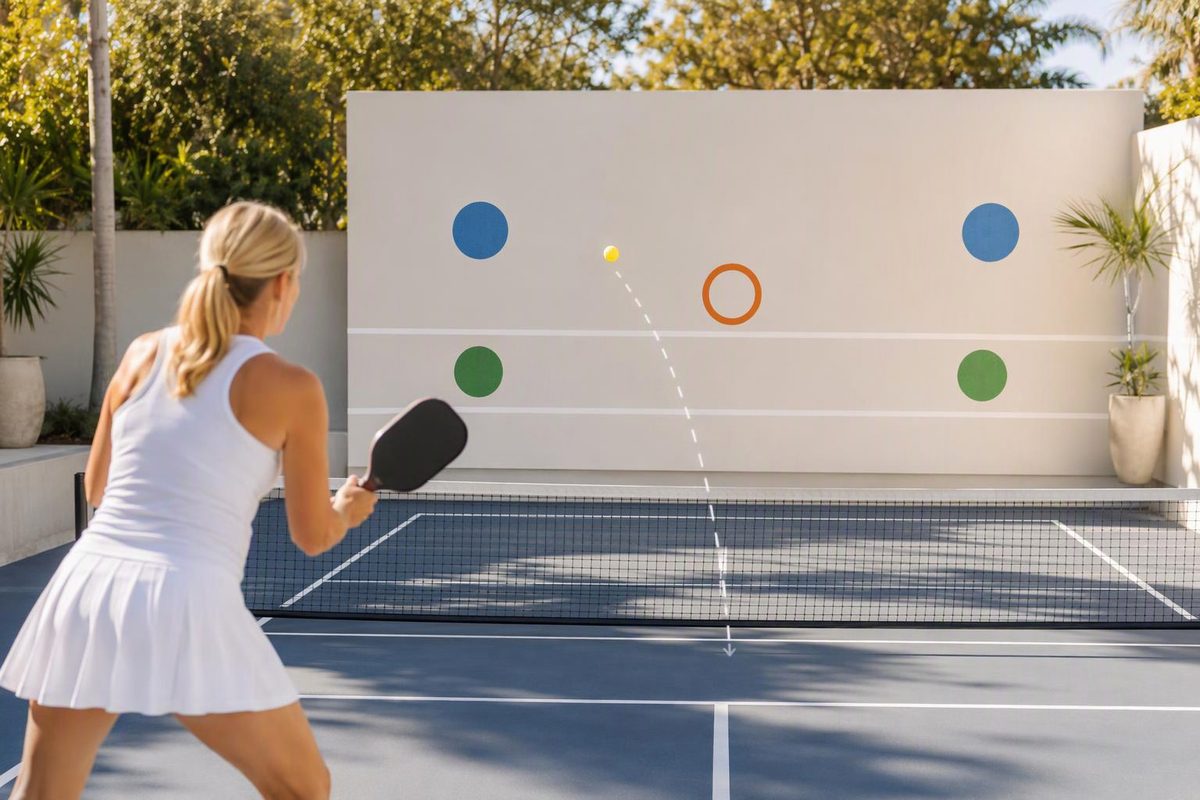
A pickleball practice wall can be an existing wall or a purpose-built rebound board. For basic solo practice, start with a flat, solid surface, clear footing, your paddle and a ball. Add removable targets only with the owner’s permission. You do not need a dedicated trainer to begin: Jennifer Lucore’s at-home practice guidance uses a wall, tape or chalk, and a target.
The important distinction: a wall target gives you feedback about contact and direction—not proof that your shot would land well on a court. Use it for controlled repetition, then check the shot over a real net.
Choose the wall before buying equipment
Look for a practice area with:
- A flat, unobstructed hitting surface. Avoid windows, protruding fixtures, damaged sections and uneven joints in your target area.
- Dry, level footing. You need room to adjust sideways and stop safely, not just room to swing.
- Space behind your starting position. A seven-foot gap between you and the wall is not enough if your next step takes you into furniture or traffic.
- Permission and a suitable time to practice. Check whether ball impacts and markings are allowed, especially in shared spaces.
Before marking anything, send a few gentle shots at the same patch of wall. Watch whether the rebounds are predictable enough to repeat without lunging. If the surface sends balls unpredictably sideways, choose another spot rather than trying to compensate with harder swings.
If you are considering a portable rebound board, check its assembled footprint, usable hitting area, storage needs and setup instructions. Make sure the base will not sit where you need to step. Follow the manufacturer’s support or anchoring instructions; do not improvise a freestanding wall by leaning a loose panel against something.
Mark three simple references
The setup below is for a vertical wall. For an angled rebound board, follow its setup guidance rather than treating these marks as equivalent court references.
1. A net-height line
Place horizontal tape with its top edge 34 inches above the practice surface. That represents the nominal height at the center of a pickleball net. The nominal sideline height is 36 inches; the 2026 USA Pickleball rulebook, Rules 3.B.6–3.B.7, specifies both heights with a quarter-inch tolerance.
For a simple straight-ahead station, one 34-inch line is enough. You do not need to reproduce an entire net’s shape.
2. A broad target above the line
Start with a rectangle roughly two feet wide and one foot tall, immediately above your net-height reference. This is a suggested starting target, not an official dimension. Make it smaller only when you can hit it without rushing or losing balance.
Pickler’s wall-practice guide also uses a net-height line and an upper target boundary to discourage uncontrolled high shots. Do not turn that into a demand to skim the tape: leave enough margin to repeat a smooth stroke.
3. A simulated Kitchen line
Mark a floor line with its edge farthest from the wall seven feet away. Treat the strip between that edge and the wall—including the line—as your simulated Kitchen.
On a court, the Kitchen is the non-volley zone. A volley is a shot hit before the ball bounces. You may enter the Kitchen to play a bounced ball, but you cannot volley while touching it or let your volley momentum carry you into it. After entering, both feet must contact the surface completely outside the zone before you volley. These are 2026 USA Pickleball Rules 3.A.4.c and 11.A–11.A.3.
Keep those habits during wall practice, even though you are not playing a legal rally.
Check the setup with ten gentle shots
Start just behind the floor line. Feed the ball softly toward your target, let the rebound bounce once, and send it back with a short, controlled stroke. You may step inside the marked line to play that bounced ball. Catch and restart whenever the ball gets away from you.
Count a successful repetition only when:
- The ball hits your intended target.
- You contact the return comfortably in front of your body.
- You remain balanced and can prepare for the next shot.
If the rebound dies before reaching you, restart with individual feeds or adjust your pace. Do not chase a continuous rally at the expense of the skill. If the ball repeatedly crowds you, soften the feed or move farther back. Once the setup works, use the 15-minute wall-drill practice for a structured session.
What the wall cannot tell you
A ball hitting tape above the net-height line has not demonstrated a successful dink or drop. The wall stops its outward flight; you cannot see where it would have landed beyond a net.
Wall practice also does not reproduce a partner’s shot selection, doubles coverage or realistic crosscourt exchanges. Pickler’s guide specifically notes the difficulty of practicing angles and drops against a wall.
At your next court session, test the same compact stroke with a partner. For soft shots, check whether the ball clears the net and lands where intended—not whether you can sustain a long rally. The partner-drill plan gives you a way to make that check.