
A Targeted 25-Minute Practice Plan for One Player
Choose one or two skills, aim at broad wall or court targets, work at a controlled pace and count only the outcomes you meant to practice.
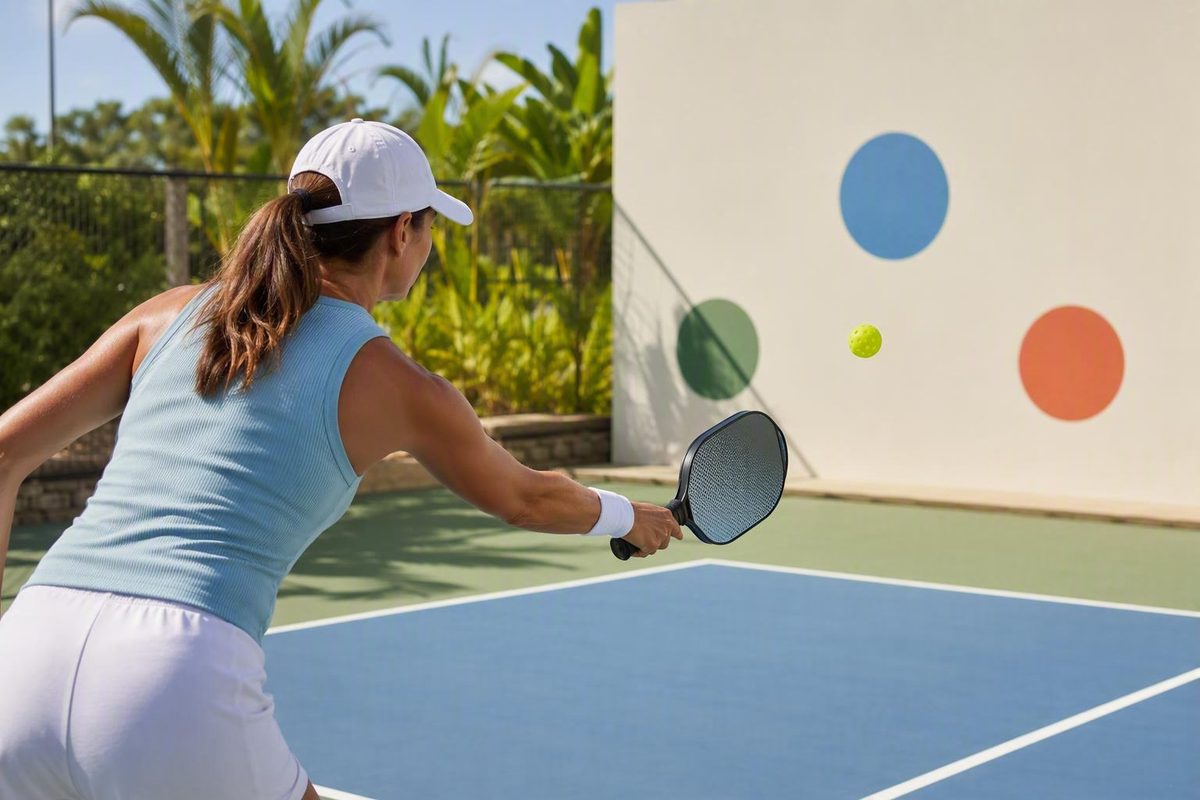
A productive solo pickleball session can be simple: choose one or two skills, aim at broad wall or court targets, work at a pace you can control, and count only the outcomes you intended to practice. Use this 25-minute plan as a manageable template—not a proven ideal. Shorten a block or repeat one priority when that better suits your space, energy, or current game.
The 25-minute solo practice card
| Time | Block | What to do | What counts |
|---|---|---|---|
| 0–4 minutes | Warm-up | Easy shadow swings, lateral movement, balance steps, and gentle self-feeds | A smooth movement sequence that finishes under balance |
| 4–12 minutes | Wall control | Choose touch, volleys, or alternating forehand-backhand contacts | The ball strikes the wall target and returns under control |
| 12–20 minutes | Court placement | Choose legal serves or self-fed drops to a marked zone | A legal serve or soft drop lands in the selected target |
| 20–24 minutes | Scored finish | Repeat one drill using fixed attempts, a timer, or a streak | The outcome defined before the set |
| 24–25 minutes | Record | Note the target, attempts, successes, longest streak, and next adjustment | A complete entry you can compare with a similar session |
Minutes 0–4: warm up
Begin without trying to hit hard. Make several relaxed shadow swings on each side, then add small lateral steps and a balance step before each imaginary contact. Finish with gentle self-feeds: drop the ball, allow one bounce, and make an easy stroke toward open space or a safe target.
Use this block to confirm that you can swing freely, move without slipping, and finish each motion under control. Resolve problems with the space or your movement before beginning quicker wall exchanges.
Minutes 4–12: choose one wall-control drill
Pick one priority rather than cycling through every stroke:
- Gentle touch into a broad wall rectangle
- Forehand-only or backhand-only volleys
- Alternating forehand-backhand contacts
- Controlled changes between softer and firmer contact
Count a repetition only when the ball strikes the intended wall zone and returns in a form you can play without lunging or losing balance. Paddle contact alone is not a successful repetition.
Minutes 12–20: choose one court-placement drill
If you have a marked court, work on either serves or self-fed drops.
For serves, choose a broad zone in the opposite diagonal service court. For drops, hand-feed from one position and aim for a towel or other movable target in the non-volley zone. Keep the setup consistent throughout the block so the final score has a clear meaning.
Minutes 20–24: finish with a score
Repeat the session’s most useful drill in one measurable format:
- Fixed attempts: 20 serves or 20 self-fed drops
- Timed set: one or more 60-second wall blocks
- Streak: the longest run of controlled target contacts
These are organizational formats, not skill-level tests. Use 10 attempts if 20 leads to rushed movement. If a timed wall set becomes frantic, pause, reset, and resume at a controllable pace.
Minute 24–25: write one line
Record the drill, target, attempts, successes, longest streak, and one adjustment for next time. “Use a larger backhand target” gives you a clearer next step than “play better.”
Set up targets without buying training equipment
For this routine, you need only a paddle, several balls, a permitted wall or court, and targets that can be moved or removed. Specialized training equipment is not required.
Possible targets include:
- Towels
- Cones
- Buckets
- Pool noodles
- Existing court lines
- Tape or chalk, when the venue expressly permits temporary markings
These are coaching conventions rather than required equipment. Selkirk’s drill guide suggests walls for forehands, backhands, volleys, and pace changes, as well as buckets, cones, pool noodles, and chalk zones for placement activities. It also advises finding walls whose owners do not object to practice use.
Permission to hit against a wall does not automatically include permission to apply tape or chalk. Confirm both separately. If markings are prohibited, use an existing wall feature as a visual reference or place movable objects on the ground, outside your movement and landing path.
Before hitting, inspect the complete area affected by the drill:
- Your full paddle swing
- The expected rebound path
- Space for lateral and recovery movement
- Places where missed or loose balls may travel
- Neighboring courts and walkways
- Other players and bystanders
- Traffic, windows, vehicles, obstacles, and fragile property
Practice only where wall or court use is allowed, clear the rebound area, and wear shoes suited to the court surface. At a wall, begin from a position where you can control the rebound rather than relying on one prescribed distance for every drill or player (solo-practice space guidance).
A wall or fence can help contain loose balls. Do not practice near a road or in a driveway where missed balls may escape into traffic, as cautioned in Paddletek’s beginner solo-practice guide.
A hard surface and firm contact can return the ball quickly. If you are rushing, flinching, or reaching, reduce the pace, enlarge the target, simplify the pattern, or move to a more manageable position.
Regulation court dimensions describe the playing space. They are not a universal clearance rule for an improvised wall area, which must be assessed according to its actual surroundings and use.
Wall targets for touch, volleys, and forehand-backhand control
Use one broad rectangle as your primary wall target. An optional horizontal reference can help you visualize trajectory, but it cannot confirm whether a shot would clear a real net and land at the intended depth. A wall sends the ball back instead of allowing it to travel across a court.
Drill 1: controlled touch
Choose a large wall zone and begin with gentle contacts. Count only a ball that:
- Strikes the selected zone.
- Rebounds at a controllable pace.
- Leaves you balanced for the next contact.
A set of up to 25 contacts is one optional way to organize the drill, not a validated benchmark. End the streak when the ball misses the target, escapes your control, or forces a reach that breaks the intended movement.
This can approximate the touch used for dinks or resets, but it does not reproduce a real net, landing depth, an opponent’s feed, or the tactical reason for selecting the shot.
Drill 2: alternating wings
Alternate forehand and backhand on every rebound. Move your feet so the ball arrives in front of the appropriate side rather than reaching across your body.
If immediate alternation is too difficult, begin with two forehands followed by two backhands. Progress to strict alternation after you can keep the rebound in the target zone.
Drill 3: short volley sets
Complete three short blocks:
- 60 seconds of forehands
- Rest and reset
- 60 seconds of backhands
- Rest and reset
- 60 seconds alternating sides
The one-minute format is simply a way to structure practice. Work from a position where the exchange remains manageable. Compact preparation, balance, and repeatable placement matter more than accumulating rapid contacts.
Drill 4: controlled pace change
After you can sustain a basic target rally, alternate one softer contact with one moderately firmer contact. The goal is to change pace without losing the target or your balanced position.
If control disappears, slow the swing, enlarge the target, simplify the sequence, change your position, or rest. Do not preserve a streak by counting accidental rebounds, uncontrolled reaches, or contacts outside the target.
Court targets for serves and self-fed drops
Court practice lets you measure where the ball lands. It works particularly well for serve placement and soft drops because you can start both without a partner.
Serve drill: broad and deep
Place a towel, cone, or other movable marker within a broad area of the opposite diagonal service court. A deep zone is one useful target option because it provides a clear placement goal without requiring a tiny marker.
Use either:
- 20 total serves toward one target, or
- 10 serves toward each of two targets
Count only legal serves that land in the selected zone. A serve that lands elsewhere in the legal service court remains legal, but it does not count as a target success.
Change one element at a time. Keep the same target while adjusting your contact setup, or retain the same setup while moving the target. Changing the serve type, target, pace, and starting position together makes the score difficult to interpret.
After each serve, add a balanced split-step or controlled recovery movement rather than standing behind the baseline and watching the ball.
Legal serve practice starts behind the baseline and follows the current service rules. The serve must travel diagonally into the opposite service court, and a permitted drop serve is distinct from an ordinary self-fed groundstroke (USA Pickleball rules summary).
Drop drill: soft landings in the kitchen
Place two towels or other movable markers in the opposite non-volley zone. From one selected position—such as midcourt or near the baseline—drop the ball from your hand, allow the planned bounce, and send it toward one target.
A success must land softly in the selected zone. If soft placement is the stated outcome, a hard ball that happens to hit the towel does not count.
You can split the block between forehand and backhand drops. Longer optional formats include 25 attempts from each side or 50 total attempts, but these are not required thresholds.
Make the drill easier by enlarging the target, choosing a more manageable feeding position, using fewer attempts, practicing one side, or pausing between feeds. Make it harder by alternating two targets or adding a balanced recovery step. Add pace only after placement and balance remain steady.
Wall-only, court-only, and no-wall substitutions
Lack of access to both a wall and a court does not have to end the session. Preserve the basic structure—warm up, complete a focused skill block, finish with a score, and record the result—while changing the exercise.
| Access | Skill block | Scored finish |
|---|---|---|
| Wall only | Controlled target rallies, alternating wings, timed volleys, and shadow recovery movement | Longest controlled streak or target hits in 60 seconds |
| Court only | Target serves, self-fed drops, static drop feeds, or lateral footwork between lines | Legal target serves or soft target landings from fixed attempts |
| No wall or court | Shadow swings, split-step rehearsals, lateral movement, and safely contained static feeds | Balanced movement sequences or controlled feeds to a permitted ground target |
For a wall-only session, replace court placement with a second wall pattern. Follow controlled touch with alternating wings, then finish with a timed target set. Add a shadow recovery movement after each short series rather than creating an exchange that is too fast to control.
For a court-only session, divide the skill block between legal serves and self-fed drops. Existing lines can define broad zones. Movable markers can also guide lateral footwork if they remain visible and outside your landing path.
Without a wall or court, concentrate on shadow swings, split steps, balance steps, and lateral patterns. Use static drop feeds only where loose balls can be contained. Do not substitute furniture, an improvised indoor barrier, an unapproved wall, or a roadside area merely to keep hitting.
A rebounder or ball machine can provide repeatable feeds, but neither is necessary for this routine. The paddle-ball-target version is enough to complete the practice card.
Use a scorecard and a control-first progression
Scoring is not about comparing yourself with another player. It makes your own practice visible.
A compact log can capture every required detail without becoming cumbersome:
| Date and drill | Setup and target | Attempts, successes, streak | Observation or next adjustment |
|---|---|---|---|
| Sept. 20 — alternating wall contacts | Comfortable position; broad wall rectangle | 25 attempts; 16 successes; streak of 7 | Slow the first backhand |
| Sept. 23 — deep serves | Baseline, right side; deep crosscourt zone | 20 attempts; 9 successes | Keep target; add recovery step |
Treat the first session as a personal baseline. Compare later results only when the target, starting position, pace, ball type, and definition of success remain reasonably similar. Fourteen hits into a large zone are not directly comparable with eight hits into a much smaller one.
Use repeated sets to decide what comes next:
| Condition | What it looks like | Next action |
|---|---|---|
| Control is unstable | Rushed swings, frequent misses, reaching, or loss of balance | Slow down, enlarge the target, simplify the movement, shorten the set, or change position |
| Control is repeatable | Similar placement and balanced finishes across repeated sets | Change one element: alternate wings or targets, add a split-step, shrink the target, or modestly increase pace |
| Fatigue affects mechanics | Late preparation, poor contact, fading accuracy, or unstable movement | Rest, reset, or end the drill |
Before each set, define what counts: a controlled wall rebound, a legal serve in the selected zone, a soft target landing, or a balanced movement sequence. Raw contact volume is not enough.
Repetition totals and timers organize practice; they do not prove that you have mastered a stroke or reached a particular rating. Progress by preserving the intended outcome while adding one challenge at a time.
Keep the targets rules-aware—and know what solo drills miss
Use regulation court geometry to place meaningful targets:
| Court feature | Regulation measurement | Practice use |
|---|---|---|
| Full court | 20 feet wide by 44 feet long | Establishes the standard singles and doubles court |
| Non-volley zone | 7 feet from the net on each side | Defines the target area for dinks and drops |
| Opposite diagonal service court | Across the net from the server | Required destination for a legal serve |
These measurements come from the 2026 USA Pickleball Official Rulebook. They define court areas but do not establish safe clearance for an improvised wall drill.
For serve practice, the ball must travel diagonally into the opposite service court. Court lines are generally treated as in, but a serve touching the non-volley-zone line is short. Place your service target clearly beyond that line (USA Pickleball rules summary).
The non-volley-zone line is part of the zone. You may enter the zone to play a ball after it bounces, but you may not volley while touching the zone or its lines. Momentum from a volley can also produce a fault, so recovery practice should finish under control (2026 USA Pickleball Official Rulebook).
The two-bounce rule requires the receiving side to let the serve bounce and the serving side to let the return bounce before either side may volley. Solo movement work can rehearse this sequence conceptually, but it cannot supply the actual return or decision that occurs during a point.
That is the main limitation of solo practice. It can isolate mechanics, placement, balance, and recovery movement, but it cannot reproduce an opponent’s changing pace, spin, movement, disguise, or pressure. Nor can it fully train doubles shot selection, partner communication, coordinated positioning, opponent reads, score-dependent choices, or the live decision to volley versus letting a ball bounce.
Use live play as the handoff. After practicing drops or resets alone, ask a partner to vary depth, pace, and placement. Your task then changes from repeating a planned stroke to reading the incoming ball and choosing a response.
When time or partner access is limited, return to the practice card: choose one or two skills, use broad permitted targets, keep the pace controllable, record successful outcomes, and change one variable at a time. Then take the stroke into a partner drill or recreational game, where placement must work alongside opponent reads, shot selection, and doubles positioning.